


While tile walls are beautiful, there are some significant disadvantages you should be aware of…
cleaning, tips-from-the-pros
Ceramic Tile – Maintenance and Upkeep
April 15, 2025
Beautiful, Durable and Low Maintenance are three of the main reasons people want glazed ceramic tile installed. Ceramic Tile properly installed and maintained can easily retain its original look for decades. While ceramic tile is durable, it is not indestructible so please be careful not to drop items on it, and follow the manufacturer’s instructions for any product used. In this article on maintenance & upkeep we are going to cover 5 items one should not do, cover the most popular area’s tile are installed, cover some helpful tips and tricks, and hopefully make it so that you can keep your ceramic tile looking great for many years to come.
Top Five Item’s of what not to do
- Do not use Steel Wool or other abrasives powders or cleaners as they can scratch the tile, allowing for them to dull or retain more dirt
- Do not use any chemicals that contain acids, they can damage the finish of the tile & the grout.
- Do not use bleach, ammonia, to clean your tiles with – it can easily change the colors of the grout.
- Do not use excessive water to clean, or let water sit for long periods of time on the tile – while the tile may be basically water proof, the grout isn’t & in some cases the underlayment isn’t either
- Do not let food products, grease, etc… sit for any length of time – clean the mess up as quickly as possible before it stains the tile or the grout
Ceramic Tile Flooring
First, make sure you sweep your tile floor regularly; this will help prevent the dirt from getting ground into the tile and grout. If you wish to use a vacuum cleaner to sweep, either use one without a beater bar or raise it up to its highest level to avoid scratching the ceramic tiles. If you can avoid tracking the dirt and mud in, do it – use one of those mats on the outside to help cut down the amount.
Mopping the floors regularly with just water will also help keep the floors looking great for years to come, but do not overdo it with the water. While the tile may be basically waterproof, the grout is not. Most manufacturers will have a preferred cleaning product for you to use – make sure you follow the directions on the product.
Be careful moving heavy items on the flooring, you can easily chip the edges, scratch the finish, or dig into the grout if you drag it. I would also recommend using leg protectors on the bottom of all furniture sitting on all types of flooring.
Ceramic Tile Countertops and Backsplashes
This is one area where low maintenance does not factor in; in fact, this is generally considered a high maintenance area. The key with ceramic tile countertops is regular cleaning, and cleaning up spills as soon as they occur. In most cases wiping down the countertops with your dishwater (before you wash or put dishes in it, of course) and a sponge is adequate – paying special attention to the grout lines. Using a special cleaner designed for tile & grout should probably be used weekly or after any heavy cooking activities. In both cases, the areas should be wiped down again with a clean damp rag using water only to remove any cleaner.
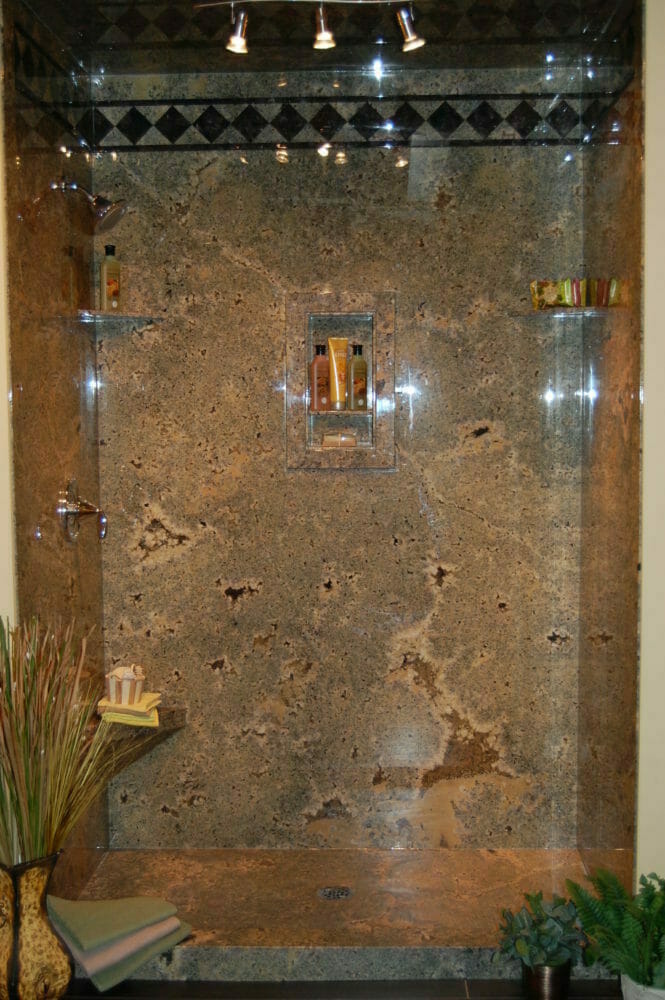
Ceramic Tile Showers and Bathtub Surrounds
To help cut down on the amount of cleaning required, we recommend that you use a squeegee after each shower or bath to remove excess water off the walls, at the transition & while you are at it, wipe down the shower doors. Make sure you use a soap dish & clean up any spilled shampoo or conditioner as soon as possible. Metal containers should never be left in the shower area as the bottoms can start rusting & leave rings on the tile & in the grout.
Expansion & Contraction Issues
Where tile meets a dissimilar surface (wall tile in a bath surround meeting the bath tub, backsplash & granite countertop, etc…), changes it’s plain (wall tile to floor tile), or an expansion joint is required – those area’s should have already been caulked with a color matching grout or in some cases, the grouting should have been tooled and silicone should have been applied. This area’s should be checked regularly and damaged caulking or silicone should be removed & replaced.
One quick trick for those that have a bathtub surround that needs caulking – make sure that you fill the bathtub with water before caulking the joint. Let the water remain in the tub until the caulking is fully cured & then drain. This allows for the caulking to compress when the tub is empty and strech back to it’s normal size when it is filled instead of being pulled.
The Grout
While grout is generally seen simply by most as a material used to fill the spaces between the tiles, the color chosen helps with the final appearance of the job and is an integral component to it lasting. There are two types of products used for grouting; an epoxy style and a cementitious-based product. The cementitious product is the one most commonly used and requires regular sealing with a grout sealer to help with maintenance, prevent staining and keep moisture from penetrating it. Epoxy grout on the other hand does not require sealing, but it still requires that it be cleaned regularly.
Now even if you seal the grout or use a 100% epoxy grout, nothing will guarantee that surface buildup or discoloration of the grout will not happen if you do not maintain it. Above we covered the normal maintenance required; sometimes heavy-duty grout cleaning is required. The first type we would recommend is a steam-cleaning version. You can also look into using a professional strength tile and grout cleaner that is capable of removing grease, soap scum, body oil, mildew stains, algae, and synthetic or acrylic waxes from the grout joints. In these cases, spot check an unobtrusive area first and follow the manufacturer’s directions.
Additional Tips, Tricks, and Notes
So what happens if you cannot stand the color of your grout, it has been permanently stained, or appears dingy but you love your tiles? Well besides just living with it, there are two options; remove the grout and get it re-grouted or use a grout colorant. Both options have their pros and cons and would probably be best addressed in a future article.
Removing a topical sealer or floor wax from a ceramic tile requires the use of a tile sealer and adhesive remover. As always, you should test a small area first and follow the manufacturer’s directions. If you are having difficulties getting it up, lightly scrub the area with a white nylon scrub pad and the cleaner.
The perfect cleaner and sealer is… well that truthfully depends on what you need and a host of other factors. For the purpose of this article, I am simply just going to recommend that you check with the tile manufacturer, grout manufacturer, or better yet bring a sample of the tile with you to the flooring store and see what they use and recommend. Just like everything else in life, there are different grades of sealants; I would definitely recommend that you go with a high quality sealant that will generally help protect your investment better.
Textured Tiles are notorious for holding dirt so be prepared for a little scrubbing with a soft brush occasionally to help keep them clean.
How often should you seal your grout? That is a good question and varies on the quality of the sealant used, traffic patterns, normal wear & tear, etc… In most cases once, a year is generally enough.
Left over tiles & grout – should not be thrown away, if a tile gets damaged you will never find an exact match as each batch is different. Make sure you write down the tile manufacturer’s name, name of the tile, color & batch number for future reference. The grout should be sealed in an airtight bag in case a tile needs to be replaced or some grout needs to be replaced. You should also save the grout manufacturers name, color and type for later reference.
Categories (tags):
Find Your Local Five Star Bath Solutions Team
FSBS teams serve communities nationwide with premium bath and shower remodeling solutions. Enter your city or ZIP code to connect with the team nearest you.
View All Locations
